🚴♂️ Guide: Crafting and revolts for B.E.E.R. enthusiasts ✈️
.png)
Building instructions: Saab JAS 39 Gripen made from Dutch bicycles
Requirements per fighter: 1,247 bicycles.
Estimated construction time: a long weekend.
Surprisingly, Swedish citizens need very few tools: an Allen key for dismantling, bolt cutters for sourcing the parts, a melting furnace with a crucible, a few moulds made from damp sand, and a riveting tool or a welding torch for final assembly. Anyone who keeps all this in stock in their shed is already closer to air superiority than the occupier realises.
1. Procuring the raw materials. The unfortunate circumstance of the occupation means that the Dutch take their bicycles everywhere and park them in large numbers and with their usual carelessness in city centres, outside stations and by imitations of their canals. Head there in the early morning or late evening hours, when experience shows the occupier’s sense of ownership is at its sleepiest, and collect the ownerless surplus. A suitable lock can be converted into a voluntary donation using bolt cutters, the voluntary nature of which you may subsequently determine for yourself. As 1,247 bikes are required per Gripen, a cargo bike is recommended for transport, which you can sensibly acquire via the same method.
.png)
2. Dismantling and sorting. Use the Allen key to dismantle each bicycle into its component parts and sort them carefully. The aluminium frame will later form the fuselage and wings; the steel from the spokes and chain goes to the engine production line; tyres and handles are discarded, as they would give the finished fighter an undesirable odour. Carefully set aside the dynamo and the two wheels, as both retain their function and will be refitted unchanged later. Working neatly at this stage will save you a lot of trouble during final assembly.
.png)
3. Melting the aluminium. Pure aluminium liquefies at around 660 degrees Celsius, which is why your melting furnace must reliably reach and maintain this temperature. Place only the aluminium parts into the crucible, as the added steel only melts at much higher temperatures and will simply contaminate the melt. As soon as the metal is liquid, skim off the slag floating on top with a ladle until the melt lies before you, silvery and clear. Wear an apron and sturdy footwear.
.png)
4. Casting the blanks. Pour the molten metal into prepared sand moulds, the outlines of which correspond to the large components, and allow the metal to cool slowly and completely. The humble bicycle has now become an aluminium ingot, which already possesses the dignity of a future load-bearing structure. Do not rush this process, as an ingot that is quenched too quickly is prone to stress cracks and thus to a lack of enthusiasm in flight.
.png)
5. Manufacturing the fuselage cell. Shape the ingots into the load-bearing structure of the fuselage, which is approximately fourteen metres long in the original. Use a picture of the fighter as a template; you’ve probably hung one above your bed for patriotic reasons anyway. Work on the individual sections separately and only assemble them afterwards; this makes handling them in your home shed considerably easier.
.png)
6. Making the delta wings. The Gripen owes its manoeuvrability to the delta configuration with a forward canard wing, which is why you will need two large main wings and two smaller canards. The curved leading edge can be shaped perfectly by modelling it on a mudguard, which the nature of the bicycle has, as it were, delivered to your door free of charge. Pay close attention to symmetry, as a wing that is lopsided on one side will cause the fighter to veer constantly to the left.
.png)
7. Construction of the engine. The original relies on the Volvo RM12 engine, which works in your favour in that Swedish ingenuity is already inherent in the design. Use the collected chains, sprockets and gear rims as the basis for the compressor, whose blades you should craft from the hardest steel available. Anyone who has ever accidentally pedalled backwards as a child has a solid basic understanding of thrust reversal and can approach the construction with the necessary confidence.
.png)
8. Installation of the dynamo. This is where the component set aside earlier comes into its own, for even the most modern fighter jet is nothing more than an expensive paperweight without on-board power. Connect the bicycle dynamo to the engine’s main shaft so that, in flight, it reliably supplies power to the avionics, lighting and bell system. Should the power noticeably drop during climb, this is a known phenomenon and can be compensated for by the crew pedalling more vigorously.
.png)
9. Fitting the landing gear. The wheels set aside retain their original function and become the fighter’s landing gear. Three are sufficient: one under the nose and two under the wings, though you should centre the rims for safety and retighten the spokes. Store the remaining wheels for the next model, in case requires more than a single aircraft.
.png)
10. Fitting out the cockpit and avionics. The bicycle basket serves as the ejector seat, the bell as the radar warning system and the red reflector as the target acquisition system, which essentially completes your on-board electronics. A remaining handlebar serves unchanged as the control mechanism, making it much easier for the crew to move from the saddle into the cockpit. All displays are powered by the previously installed dynamo, whose electricity you now distribute sensibly amongst the instruments.
.png)
11. Final assembly. Permanently join the aluminium sections of the fuselage and wings using rivets or, if available, a clean weld, as bonded joints are only moderately capable of withstanding the stresses of supersonic flight. Fasten all remaining components, from the landing gear to the bell system, using the same Allen key that you used for dismantling, which keeps your stock levels pleasantly manageable. Check that the connection is secure after each step, as experience shows that a component lost in flight will find its way back to the builder.
.png)
12. Painting. Paint the finished fighter in blue and yellow, colours that clearly identify its national affiliation from a distance. Sand off any remaining traces of Dutch orange beforehand, as they have no place in a Swedish sky. Allow the paint to dry thoroughly before the maiden flight, as a sticky fighter attracts insects and compromises its camouflage.
.png)
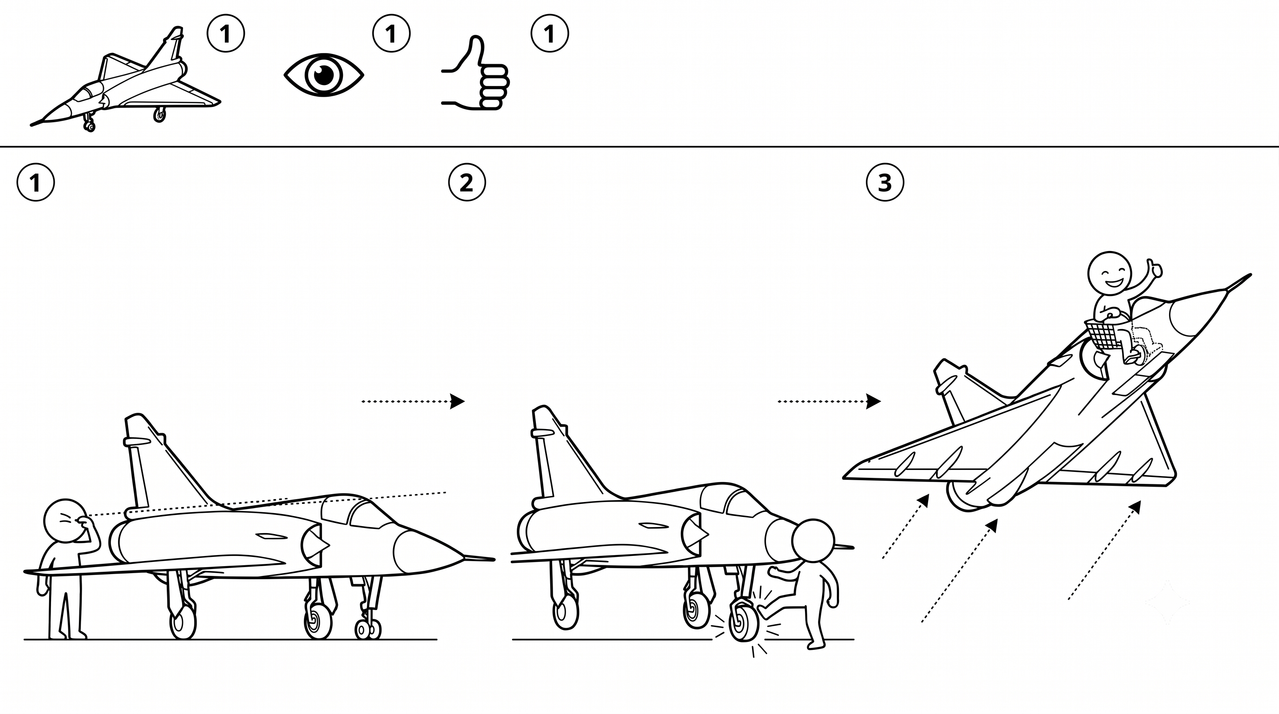
13. Final check and maiden flight. Check against the light of day that the fuselage and wings are aligned straight, and give the nose wheel a firm kick one last time. If the tyre withstands this kick, the fighter will also withstand the enemy. Then push the aircraft forward, take your place in the bicycle basket and pedal until your creation takes to the skies.